01. 在[Welcome to Red Hat Enterprise Linux 6.5]視窗中游標選到[Install or upgrade an existing system]後按下[Enter]

02. 在[Disk Found]按下[Skip]

03 按下[Next]

04. 在[What language would you like to use during the installation process?]視窗按下[Next]

05. 在[Select the appropriate keyboard for the system.]視窗按下[Next]

06 在[What type of devices will your installation involve?]按下[Next]

07. 在[Storage Device Warning]視窗中按下[Yes, discard any data]

08. 在[Please name this computer. The hostname identifies the computer on a network.]視窗中的[Hostname]輸入[racnode01.dba.local],在按下下方的[Configure Network]

09. 在[Network Connections]視窗中點選[System eth0]後按下[Edit]

10. 在[Editing System eth0]視窗中勾選[Connect automatically],點選[IPv4 Settings]頁籤,將[Method]下拉選[Manual],再按下[Add]輸入如下資訊後按下[Apply]。每個環境不同在本例中相關資訊如下
Adderss:192.168.100.10
Netmask:24
Gateway:192.168.100.254
DNS server:192.168.100.100

11. 回到[Network Connections]視窗中按下[Close]

12. 回到[Please name this computer. The hostname identifies the computer on a network.]視窗按下[Next]

13. 在[Please select the nearest in your time zone]視窗中的[Select city]下拉選[Asia/Taipei]後按下[Next]

14. 在[The root account is used for administering the system. Enter a password for the root user]視窗中的[Root Password]及[Confirm]輸入兩次相同之密碼後按下[Next]

15. 在[Which type installation would you like?]視窗中點選[Use All Space],再將最下方的[Review and modify partitioning layout]勾選後按下[Next]

16. 點選[lv_root]後按下[Edit]

17. 在[Edit Logical Volume:lv_root]視窗中的[Size]輸入[32262]後按下[OK]
P.S.:縮小Root Mount Point主要是為了放大SWAP空間,因為在安裝Oracle時會檢查SWAP間是否有大於等於RAM,不然會不給安裝。

18. 點選[lv_swap]後按下[Edit]

19. 在[Edit Logical Volume:lv_swap]視窗中的[Size]輸入[8192]後按下[OK]

20. 回到[Please Select A Device]視窗按下[Next]

21. 在[Format Warnings]視窗中按下[Format]

22. 在[Writing storage configuration to disk]視窗中按下[Write change to disk]

23. 按下[Next]

24. 在[The default installition of Red Hat Enterprise Linux is a basic server install. You can optionally select a different set of software now.]視窗最下方點選[Customize now]後按下[Next]

25. 此步驟中的需安裝的Package詳閱文章最後的註一,選完後按下[Next]

26. 按下[Reboot]

27. 在[Welcome]視窗中按下[Rorward]

28. 在[License Information]視窗中按下[Next]

29. 在[Set Up Software Update]視窗中點選[No, I prefer to register at a later time]後按下[Forward]

30. 在[Are you Sure?]視窗中按下[register

31. 在[Finish Update Setup]視窗中按下[Forward]

32. 在[Create User]視窗中按下[Forward]

33. 按下[Yes]

34. 在[Date and Time]視窗中確認時間及日期是否正確後按下[Forward]

35. 在[Kdump]視窗中將[Enable kdump]取消勾選後按下[Finish]

36. 按下[Yes]

37. 按下[OK]

38. 安裝所需Package(安裝光碟片中有)。若在步驟25有安裝所需之PACKAGE的話,僅需再安裝以下兩隻,更完整的PACKAGE請詳閱註二
1. ksh
2. libaio-devel
39. 增加HOSTS資訊
vi /etc/hosts
192.168.100.10 racnode01.dba.local
40. 關閉SELinux
vi /etc/selinux/config
SELINUX=disabled
41. 關閉防火牆
/etc/rc.d/init.d/iptables stop
chkconfig iptables off
42. 建立相關帳號及群組
groupadd --gid 54321 oinstall
groupadd --gid 54322 dba
groupadd --gid 54323 asmdba
groupadd --gid 54324 asmoper
groupadd --gid 54325 asmadmin
groupadd --gid 54326 oper
useradd --uid 54321 --gid oinstall --groups dba,oper,asmdba,asmoper oracle
passwd oracle
useradd --uid 54322 --gid oinstall --groups dba,asmadmin,asmdba,asmoper grid
passwd grid
43. 建立軟體所需目錄
mkdir -p /u01/app/grid
mkdir -p /u01/app/11.2.4/grid
chown -R grid:oinstall /u01
mkdir -p /u01/app/oracle
chown oracle:oinstall /u01/app/oracle
chmod -R 775 /u01
44. 設定ORACLE帳號所需之環境變數
使用ORACLE帳號登入
vi /home/oracle/.bash_profile
if [ -f ~/.bashrc ]; then
. ~/.bashrc
fi
alias ls="ls -FA"
ORACLE_SID=orcl; export ORACLE_SID
ORACLE_UNQNAME=orcl; export ORACLE_UNQNAME
JAVA_HOME=/usr/local/java; export JAVA_HOME
ORACLE_BASE=/u01/app/oracle; export ORACLE_BASE
ORACLE_HOME=$ORACLE_BASE/product/11.2.0.4/dbhome_1; export ORACLE_HOME
ORACLE_PATH=/u01/app/common/oracle/sql; export ORACLE_PATH
ORACLE_TERM=xterm; export ORACLE_TERM
NLS_DATE_FORMAT="DD-MON-YYYY HH24:MI:SS"; export NLS_DATE_FORMAT
TNS_ADMIN=$ORACLE_HOME/network/admin; export TNS_ADMIN
ORA_NLS11=$ORACLE_HOME/nls/data; export ORA_NLS11
PATH=.:${JAVA_HOME}/bin:${PATH}:$HOME/bin:$ORACLE_HOME/bin
PATH=${PATH}:/usr/bin:/bin:/usr/bin/X11:/usr/local/bin
PATH=${PATH}:/u01/app/common/oracle/bin
export PATH
LD_LIBRARY_PATH=$ORACLE_HOME/lib
LD_LIBRARY_PATH=${LD_LIBRARY_PATH}:$ORACLE_HOME/oracm/lib
LD_LIBRARY_PATH=${LD_LIBRARY_PATH}:/lib:/usr/lib:/usr/local/lib
export LD_LIBRARY_PATH
CLASSPATH=$ORACLE_HOME/JRE
CLASSPATH=${CLASSPATH}:$ORACLE_HOME/jlib
CLASSPATH=${CLASSPATH}:$ORACLE_HOME/rdbms/jlib
CLASSPATH=${CLASSPATH}:$ORACLE_HOME/network/jlib
export CLASSPATH
THREADS_FLAG=native; export THREADS_FLAG
export TEMP=/tmp
export TMPDIR=/tmp
umask 022
45. 設定GRID帳號所需之環境變數
使用GRID帳號登入
vi /home/grid/.bash_profile
if [ -f ~/.bashrc ]; then
. ~/.bashrc
fi
alias ls="ls -FA"
JAVA_HOME=/usr/local/java; export JAVA_HOME
ORACLE_BASE=/u01/app/grid; export ORACLE_BASE
ORACLE_HOME=/u01/app/11.2.0.4/grid; export ORACLE_HOME
ORACLE_PATH=/u01/app/oracle/common/oracle/sql; export ORACLE_PATH
ORACLE_TERM=xterm; export ORACLE_TERM
NLS_DATE_FORMAT="DD-MON-YYYY HH24:MI:SS"; export NLS_DATE_FORMAT
TNS_ADMIN=$ORACLE_HOME/network/admin; export TNS_ADMIN
ORA_NLS11=$ORACLE_HOME/nls/data; export ORA_NLS11
PATH=.:${JAVA_HOME}/bin:${PATH}:$HOME/bin:$ORACLE_HOME/bin
PATH=${PATH}:/usr/bin:/bin:/usr/bin/X11:/usr/local/bin
PATH=${PATH}:/u01/app/common/oracle/bin
export PATH
LD_LIBRARY_PATH=$ORACLE_HOME/lib
LD_LIBRARY_PATH=${LD_LIBRARY_PATH}:$ORACLE_HOME/oracm/lib
LD_LIBRARY_PATH=${LD_LIBRARY_PATH}:/lib:/usr/lib:/usr/local/lib
export LD_LIBRARY_PATH
CLASSPATH=$ORACLE_HOME/JRE
CLASSPATH=${CLASSPATH}:$ORACLE_HOME/jlib
CLASSPATH=${CLASSPATH}:$ORACLE_HOME/rdbms/jlib
CLASSPATH=${CLASSPATH}:$ORACLE_HOME/network/jlib
export CLASSPATH
THREADS_FLAG=native; export THREADS_FLAG
export TEMP=/tmp
export TMPDIR=/tmp
umask 022
46. 設定shell權限
touch /etc/security/limits.d/99-grid-oracle-limits.conf
vi /etc/security/limits.d/99-grid-oracle-limits.conf
oracle soft nproc 2047
oracle hard nproc 16384
oracle soft nofile 1024
oracle hard nofile 65536
oracle soft stack 10240
oracle hard stack 32768
grid soft nproc 2047
grid hard nproc 16384
grid soft nofile 1024
grid hard nofile 65536
grid soft stack 10240
grid hard stack 32768
47. vi /etc/profile.d/oracle-grid.sh
#Setting the appropriate ulimits for oracle and grid user
if [ $USER = "oracle" ]; then
if [ $SHELL = "/bin/ksh" ]; then
ulimit -u 16384
ulimit -n 65536
else
ulimit -u 16384 -n 65536
fi
fi
if [ $USER = "grid" ]; then
if [ $SHELL = "/bin/ksh" ]; then
ulimit -u 16384
ulimit -n 65536
else
ulimit -u 16384 -n 65536
fi
fi
48. 設定Kernel Parameters,P.S.:在原本的設定中已經有kernel.shmmax及kernel.shmall請註記掉
vi /etc/sysctl.conf
vm.swappiness = 0
vm.dirty_background_ratio = 3
vm.dirty_ratio = 80
vm.dirty_expire_centisecs = 500
vm.dirty_writeback_centisecs = 100
kernel.shmmax = 68719476736
kernel.shmall = 4294967296
kernel.shmmni = 4096
kernel.sem = 250 32000 100 128
# fs.file-max needs to be set to at least 6815744 for Oracle Installation.
fs.file-max = 6815744
fs.aio-max-nr = 1048576
net.ipv4.ip_local_port_range = 9000 65500
net.core.rmem_default = 262144
net.core.rmem_max = 4194304
net.core.wmem_default = 262144
net.core.wmem_max = 1048576
# set to the appropriate private eth devices
net.ipv4.conf.em3.rp_filter = 2
net.ipv4.conf.em4.rp_filter = 2
49. 讓前述步驟修改的設定立即生效
sysctl -p
安裝ORACLE軟體
50. 用ORACLE帳號登入後安裝
[oracle@racnode01 database]$ ./runInstaller
Starting Oracle Universal Installer...
Checking Temp space: must be greater than 120 MB. Actual 21302 MB Passed
Checking swap space: must be greater than 150 MB. Actual 8191 MB Passed
Checking monitor: must be configured to display at least 256 colors. Actual 16777216 Passed
Preparing to launch Oracle Universal Installer from /tmp/OraInstall2016-05-03_10-42-08AM. Please wait ...[oracle@racnode01 database]$
51. 在[Configure Security Updates]視窗中將[I wish to receive security updates via Oracle Support]取消勾選後按下[Next]

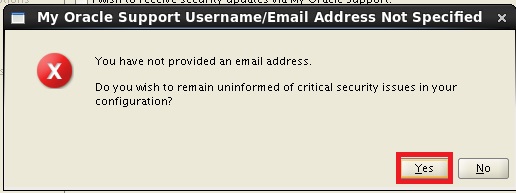
52. 在[My Oracle Support Username/Email Address Not Specified]視窗中按下[Yes]
53. 在[Download Software Updates]視窗中點選[Skip software updates]後按下[Next]

54. 在[Select Installation Option]視窗中點選[Install database software only]後按下[Next]

55. 在[Drid Installation Options]視窗中點選[Single instance database installation]後按下[Next]

56. 在[Slect Product Languages]視窗中按下[Next]

57. 在[Select Database Edition]視窗中按下[Next]

58. 在[Specify Insatllation Location]視窗中按下[Next]

59. 在[Create Inventory]視窗中按下[Next]

60. 在[Privileged Operating System Groups]視窗中按下[Next]

61. 在[Perform Prerequiste Checks]視窗中勾選[Ignore All]後按下[Next]。P.S.:因在步驟38中已安裝KSH故pdksh可不安裝。


63. 在[Summary]視窗中按下[Install]

64. 在[Execture Configuration scripts]視窗中,透過root帳號依序執行[orainstRoot.sh]及[root.sh]後按下[OK]。詳細執行語法參閱註四。

65. 在[Finish]視窗中按下[Close]

設定Listener
66. 啟動NETCA
到/u01/app/oracle/product/11.2.0.4/dbhome_1/bin路徑下
./netca
67. 在[Oracle Net Configuration Assistant:Welcome]視窗中按下[Next]

68. 在[Oracle Net Configuration Assistant:Listener Configuration,Listener]視窗中按下[Next]

69. 在[Oracle Net Configuration Assistant:Listener Configuration,Listener Name..]視窗中按下[Next]

70. 在[Oracle Net Configuration Assistant:Listener Configuration,Select Proto...]視窗中按下[Next]

71. 在[Oracle Net Configuration Assistant:Listener Configuration,TCP/IP Proto..]視窗中按下[Next]

72. 在[Oracle Net Configuration Assistant:Listener Configuration,More Listen..]視窗中按下[Next]

73. 在[Oracle Net Configuration Assistant:Listener Configuration Done]視窗中按下[Next]

74. 在[Oracle Net Configuration Assistant:Welcome]視窗中按下[Finish]

安裝Oracle Database
75. 啟動DBCA
到/u01/app/oracle/product/11.2.0.4/dbhome_1/bin路徑下
./dbca
76. 在[Database Configuration Assistant:Welcome]視窗中按下[Next]

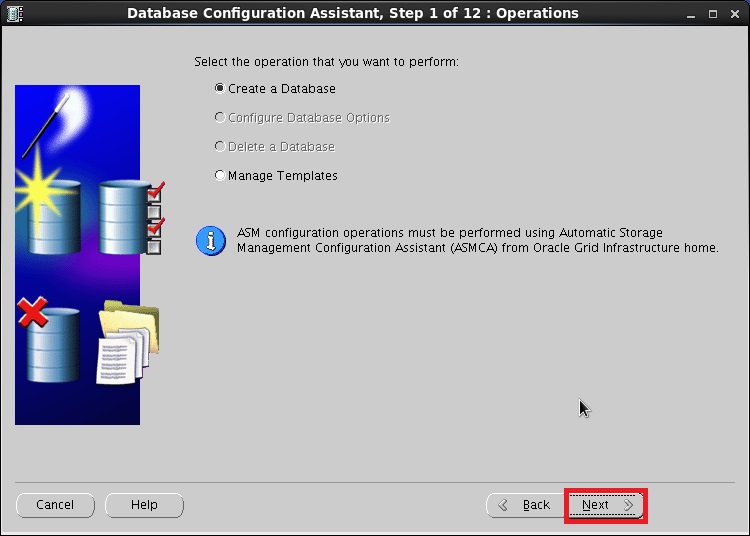
77. 在[Database Configuration Assistant, Step 1 of 12:Operations]視窗中按下[Next]
78. 在[Database Configuration Assistant, Step 2 of 12:Database Templates]視窗中按下[Next]

79. 在[Database Configuration Assistant, Step 3 of 12:Database Identificatiom]視窗中的[Global Database Name]輸入[orcl]後按下[Next]

80. 在[Database Configuration Assistant, Step 4 of 12:Management Options]視窗中按下[Next]

81. 在[Database Configuration Assistant, Step 5 of 12:Database Credentials]視窗中點選[Use the Same Administrative Paaword for all Accounts],輸入兩次密碼(此密碼不可含有特殊字元,不然安裝到約80%會報錯)後按下[Next]

82. 在[Database Configuration Assistant, Step 6 of 12:Database File Locations]視窗中按下[Next]

83. 在[Database Configuration Assistant, Step 7 of 12:Recovery Configuration]視窗中將[Specify Fast Recovery Area]取消勾選後按下[Next]。
P.S.:如果有足夠的磁碟空間建議開啟,且FRA空間大小需大於資料庫Size

84. 在[Database Configuration Assistant, Step 8 of 12:Database Content]視窗中按下[Next]

85. 在[Database Configuration Assistant, Step 9 of 12:Initialzation Parameters]視窗中的[memory]頁籤,將[Use Automatic Memory Management]勾選

86. 在[Database Configuration Assistant, Step 9 of 12:Initialzation Parameters]視窗中的[character Sets]頁籤,點選[Choose from the list of character Sets]勾選,在[Database character Sets]指定為[Al32UTF8......]後按下[Next]

87. 在[Database Configuration Assistant, Step 10 of 12:Database Storage]視窗中按下[Next]

88. 在[Database Configuration Assistant, Step 11 of 12:Creation Options]視窗中按下[Finish]

89. 在[Confirnation]視窗中按下[OK]

90. 在[Database Configuration Assistant]視窗中按下[Exit],完成安裝Database

91. 檢查Instance Status
[oracle@racnode01 ~]$ sqlplus / as sysdba@orcl
SQL*Plus: Release 11.2.0.4.0 Production on Tue May 3 13:39:53 2016
Copyright (c) 1982, 2013, Oracle. All rights reserved.
Connected to:
Oracle Database 11g Enterprise Edition Release 11.2.0.4.0 - 64bit Production
With the Partitioning, OLAP, Data Mining and Real Application Testing options
SQL> select instance_name,status from v$instance;
INSTANCE_NAME STATUS
---------------- ------------
orcl OPEN
註一:需安裝的Package如下
Base System > Base
Base System > Client management tools
Base System > Compatibility libraries
Base System > Hardware monitoring utilities
Base System > Large Systems Performance
Base System > Network file system client
Base System > Performance Tools
Base System > Perl Support
Servers > Server Platform
Servers > System administration tools
Desktops > Desktop
Desktops > Desktop Platform
Desktops > Fonts
Desktops > General Purpose Desktop
Desktops > Graphical Administration Tools
Desktops > Input Methods
Desktops > X Window System
Development > Additional Development
Development > Development Tools
Applications > Internet Browser
註二:安裝所需Package
cloog-ppl
compat-libcap1
compat-libstdc++-33
cpp
gcc
gcc-c++
glibc-devel
glibc-headers
kernel-headers
ksh
libXmu
libXt
libXv
libXxf86dga
libXxf86misc
libXxf86vm
libaio-devel
libdmx
libstdc++-devel
mpfr
make
ppl
xorg-x11-utils
xorg-x11-xaut
註三:Oracle建議的SWAP空間計算方式如下
Oracle建議您將交換空間的內存量的1.5倍與2 GB的RAM或更少的系統。對於具有2 GB的系統,
最小swap space=1.5GB
RAM<2GB-->swap space=RAM*1.5(或2)
RAM為2GB到16GB RAM-->swap space等於RAM。
RAM>16GB-->swap space=16GB
查看記憶體大小
cat /proc/meminfo | grep MemTotal
查看SWAP大小
cat /proc/meminfo | grep SwapTotal
註四:詳細執行語法
[root@racnode01 oraInventory]# ./orainstRoot.sh
Changing permissions of /u01/app/oraInventory.
Adding read,write permissions for group.
Removing read,write,execute permissions for world.
Changing groupname of /u01/app/oraInventory to oinstall.
The execution of the script is complete.
[root@racnode01 dbhome_1]# ./root.sh
Performing root user operation for Oracle 11g
The following environment variables are set as:
ORACLE_OWNER= oracle
ORACLE_HOME= /u01/app/oracle/product/11.2.0.4/dbhome_1
Enter the full pathname of the local bin directory: [/usr/local/bin]:
Copying dbhome to /usr/local/bin ...
Copying oraenv to /usr/local/bin ...
Copying coraenv to /usr/local/bin ...
Creating /etc/oratab file...
Entries will be added to the /etc/oratab file as needed by
Database Configuration Assistant when a database is created
Finished running generic part of root script.
Now product-specific root actions will be performed.
Finished product-specific root actions.
